Featured post

NetTools Basics

nettools


NetTools has a number of common features which are used throughout the program. This post provides details on some of these features.

The screenshot below shows the common features of the NetTools interface.

Nav

These buttons are used to navigate the tests that have been previously run.

Connection Profiles

This button opens the Connection Profile dialog used to manage Connection Profiles to connect to specific domain controllers or domains. 

Resolver

This button opens the Resolver dialog, which can be used to resolve multiple names and track which objects have been visited.

Help

This button will open the help page on the NetTools website for the selected test option.

Quick Search

This option is used as a quick search of the AD, and is a shortcut for the Search option.

Pinned Option

Options that the user has pinned will be displayed here.
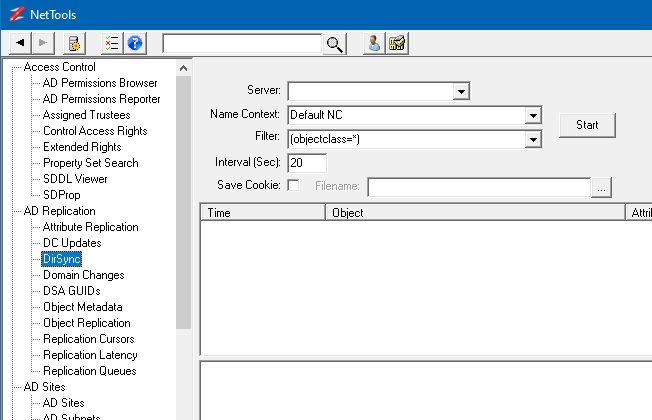
Available Tests

The list of available tests are displayed here. The tests are grouped in categories to help find the appropriate test. 

Test Options

For each test, the test options are displayed here, use these to configure the test, the associated button is used to start the test.

Result Option

The results of the tests are displayed in this area.  Use the right click context menu to access additional features.

Info

This area is used to display additional information about the test or error messages that are generated during the test execution.

AD or Server Connections

If NetTools is run on a machine that is joined to an AD domain, by default NetTools will connect to the domain controllers of that domain without needing to specify the server. It will also use the credentials of the user running NetTools to make the connection. If you want to connect to a specific domain controller, different domain, or use a different set of credentials, you use Connection Profiles.  See Connection Profiles for more details.

Server Lists
In most of the options there is a field to specify the server or domain, this field is used to enter a server name or select a Connection Profiles that the test will be run against.  The server and domain fields are optional, if no entry is provided NetTools will either connect to the domain the machine running NetTools to joined to, or use the default Connection Profile, if one has been defined.

Navigation
The toolbar is used to navigate the tests and access a number of features in NetTools.  The toolbar has both fixed buttons and user selected buttons.

The Back and Forward buttons allow you to move backwards and forwards between tests you have used. This is useful if you select a linked option and want to go back to the previous test.  The Connection Profiles button opens the Connection Profiles dialog, which allows you to configure profiles that defines the LDAP server, GC server, SSL, authentication, credentials and paging properties.  For more details see Connection Profiles. The Resolver button will open the Resolve dialog, which lets you resolve different input types and provides a temporary scratch pad when investigating an issue.  For more details see Resolver.  The Help button opens the help page on the NetTools.net website for the selected test.  The Quick search entry field provides a quick entry method to perform a search of the AD using the User - Search option.

Permissions
You don't need any specific permissions to run NetTools, only execute right on the file system.  With a typical AD implementation, a normal user can read a lot of the details in the AD, there are few features that might need elevated rights, i.e. viewing deleted objects or low level replication data shown in the Replication Queues option, where elevated permissions are required this is included in the corresponding Option's web page.  Only other scenario where permissions can be an issue is when NetTools is run on a Domain Controller that has User Access Control (UAC) enabled, the results returned by the local Domain Controller will be reduced unless NetTools is executed with Run as Administrator option.  In some tests, this might seen be seen as an error 1300 - Not all privileges or groups referenced are assigned to the caller.

Where to start
The number of options in NetTools can make it confusing where to start.  The best approach is to start with the Search option under Users or use the quick search option, this allows you to search the AD, be it at the Forest or Domain level for any object in the Active Directory, from there the context menu options allows you to then interrogate the returned objects.  See User Search.

To allow you to find your favorite option quickly, NetTools includes a Pin option, which will add user defined button to the toolbar to allow you to select your commonly used options quickly.  To Pin an item, select the option, then right click on the option name and select the Pin from the context menu, you will be prompted to select an icon for the button.  To remove a Pinned item, simply right click on the button on the toolbar and select Remove.

Option Pinning

Option or test Linking
For a number of the tests the output from one can be used as the input for other tests and options, by selecting the corresponding output entry and right clicking the context menu will display these options.  The User Search option has a number of linked options that are displayed under the use with sub menu.

Copy and Paste
The outputs from the tests can be copied into other functions in NetTools or to external programs.  The Copy and Paste options are displayed in the right click context menus. For table views it's possible to copy the data in a single column, the line, or the entire table. When using the copy column option, mouse position when the right click is pressed, is used to define which column will be selected.  For text based output fields it's possible to copy the text as with standard copy and paste. The Copy works with a single or multiple selected items, and when copying the details from all selected items is copied. A number of keyboard shortcuts are defined, Ctrl+C will copy the the details of from the column of the select items, Ctrl+L will copy all the details of the selected items, Ctrl+T will copy the entire contents of the table, include headers. The Copy to new window context menu option will copy the contains of the view to a new detached window, which provide additional sort and filtering options.  See Copy to new window

Messages/Results pane
On most options, there is a lower pane, this pane is used to display any errors or status report from the execution.  Any error messages or codes returned by the APIs are displayed here.

Exporting Objects
There is the ability to export objects in LDIF file format, this is available from the context menus. See LDIF Export for more details.

Common Dialogs
NetTools has four common dialogs which are available from most context menus on in the results and options.  These are the AD Properties, Attributes, Meta Data,  and Permissions dialogs which is used to display and edit an object's permissions, these dialogs are accessed via the context menu and are listed at the bottom of menu, as shown below.

Context Menu
AD Properties
Attributes
Meta Data
Permissions

Resolver
The Resolver dialog provides a scratch pad to temporary store items that you are troubleshooting or investigating. The Resolver dialog is accessed via the toolbar and items can be added to the dialog either from the context menu, pressing Ctrl+R, manual entry, or pasting a list of DN, samaccountname, email, upn or displaynames.  From the Resolver dialog the NetTools options and test can be selected from the context menu in the Resolver dialog.

Resolver Context Menu

NetTools saved configuration
NetTools uses a single configuration file called NetTools.ini, this is used to save any user defined configuration or lists.  NetTools will try to read the configuration from the same location as the exe from executed from.

NetTools v1.32.0

AD Permissions Editor 

Updated AD Permissions dialog to provide the ability to edit the permissions of an object. The edit option can be used in conjunction with the Effective Rights tab to model permission changes. See Permissions Dialog or How to edit an AD object's permissions.

Reports 

This option is used to display the direct and indirect reports under the nominated User. See Reports

General

Added UAC detection at startup and warn if a restricted token is detected when running on a DC, as sthe DC may not return some data due to the restricted token.  Replaced all instances of strcpy with strncpy to help prevent memory overflows.  Better support has been added for Unicode characters not included in the current code page. For DNs that contain a Unicode character, the DN will be encoded as # hexstring, i.e. CN=#04044761C48D,DC=w2k12,DC=local.

AD Effective Permissions

A new capability has been added to the AD Permissions Browser and the Permissions dialog to show the Effective Permissions. In AD Permissions Browser, the Effective Permissions are shown while browsing the AD. See AD Effective Permissions for more details.

AD Permissions Browser

The trustee option was updated to automatically add Pre-Windows 2000 Compatible Access group based on the group membership.
Added option to export permissions.
Permissions are now colour-coded to reflect the permissions that have been granted.
Updated the Trustee option to include a pre-Windows 2000-compatible access group to the access token.
Updated Trustee select to display the object search dialog if the User is not found.
Updated the ACE flags to provide more details of the ACE.
Fixed bug where list contents are not cleared when switching between permissions tabs.
Fixed intermittent error when switching between DACL and Default Security permissions for Schema objects.
Additional caching has been added to improve performance when switching between permission types on the same object.

AD Permissions Reporter

Added option to include Authentication group.
Fixed new rule defaulting the scope selection.

Permissions Dialog

Updated trustee selection to include the option to use the current User's access token.
Added the Effective Rights tab to display the Effective Permissions of the selected trustee. See Permissions dialog
Updated to include SACL permissions

AD Properties Dialog

Updated LAPS tab to support both LAPS v1 and v2.
Update the function of Absolute checkbox to refresh the TokenGroup list when changed.
The account option is updated to show the status of the User who cannot change their password based on the object permissions.
Added a Permissions button to the dialog.
Updated the TokenGroup tab so it doesn't refresh each time it's selected.
TokenGroups now uses the Profile cache to improve name resolution performance over slow links.
Updated to handle attributes that can't be resolved or displayed correctly, due to Unicode characters.
Updated to support Unicode DN in DN-DN attributes - member, memberof, manager, direct reports
Added extra field on Objects tab to display UTF-8 encoded DN, is displayed for DNs that contain Unicode characters

Connection Profiles

Added option to specify the LDAP Protocol Version to be used for the profile. The default is Version 3.

DC Resolution

Updated LDAP and DS binds to use the connection profiles.

DirSync

Updated the cookie functionality so show changes if the cookie is subsequentially used.

DsGetDcName

Added additional options for Windows 2022 and an Advanced View to show the associated API constants for the options. Also updated the output to display the details of the flags passed to the API.

Error Messages

Updated LDAP Error messages to also return the Windows equivalent error message.

Export Permissions

added the option to export the permissions of objects from AD Permissions Browser and Permissions dialog

GPO Explorer

Updated the context menu so the Edit GPO option is available in the tree view and GPO list views.
Updating testing to show the results of the data capture phase if a single server is selected.
Updated the GPO list view to include who has been assigned the Apply GPO right.
Additional tabs were added on the Group Policy Object view to display the Policies and Default GPO permissions.
GPO Test, Updated logic so if sysvol is inaccessible then all sysvol tests reflect the failure.
Fixed an intermittent exception error on the Domain based GPO tests.
Update the tests to include additional testing of the permissions on both AD and Sysvol, and checks that the sysvol permissions are the same across all DCs
Added additional Sysvol test on individual GPO details to test and report on file permissions.
Added option to open and view the settings in registry.pol files.

Group Compare

Added a new membership compare option of Member Recursive, which will compare the membership of a group and all nested groups.

LDAP Browser

Fixed bug where user-selected decode types are not honoured.

LDAP Search

Updated the Manage Control dialog to allow the selection of Sequence encapsulated of the value, to provide better support for other control types. See details here
Fixed bug that could cause an exception when multiple Date meta data decodes are used
Added metav attribute decode for value based replication details contained in the msds-msDS-ReplValueMetaData attribute.
Added decode for UTCTime and change dynamic decode to select UTCTime for OID 2.5.5.11 and OMSyntax = 23.

Meta Data Dialog

Updated to support F5 refresh option

Object Count

Updated to support GC connections so the count can be completed across the entire forest.

Object Replication

Added context menu option called Move to Top as the first DC in the list is used as the source DC to compare the other DC against.

Organization Dialog

updated to include Organisation Structure in the context menu

Ping

Updated context menus to disable change option when tests are running.

Schema Versions

Updated to support LAPS v2, Exchange 2019 CU13.

Search

The Use With context menu updated to include an option to select Effective Permissions

Time Converter

Updated to support hex-based 64 bit time entries, i.e 0x1d99bfe7fb26dbd

ACL Viewer v1.9.4

This is a new version of ACL Viewer available under the other Tools section.  This includes a number of update to improve the functionality and usability.

The Permissions pane now has colour coded permissions to help identify what permissions have been assigned.  Red - for Full Control, Purple - for Change permissions, and Green for Read Permissions.

ACL Viewer - Colours

The Folders pane also gets a colour makeover, now when in Trustee Mode, the folders will also be colour-coded based on the permissions the selected trustee has on the folder.  This makes it easy to see at a glance what permissions the trustee has.

ACL Viewer - Folder Colours

Also while in Trustee Mode only the permissions that are for the selected trustee will have any colours, the permissions that are not assigned to the selected Trustee are shown as greyed out, as shown above.

The Access Token dialog has also been updated to include an option to remove groups from the selected trustee access token.  This will allow you to display specific permissions that have been assigned.

ACL Viewer - Access Token

Another new feature is the Expand option on the folders context menu, this allows you to expand all the sub-folders under the selected folder.

ACL Viewer - Context Menu

The final addition is the Assigned Trustees option on the folders context menu.  This option will scan the select folder for all the trustees that have been assigned in the permissions in the path.  This is useful when migrating servers to a different domain, and you want to know which groups are being used to access the folder structure, so they can be migrated as well.  The option will display all the trustees that have been assigned permissions.

Assigned Trustees

How to: Copy a user’s group membership

In this post, we will look at how to use NetTools to copy the group membership from one user to another.

To add or remove a user from a group, we need to make the changes on the group itself; the native AD tools hide this requirement to simplify AD management.  NetTools is the same; it can make group changes on the user objects.

To copy the group membership we need to use the NetTools AD Properties dialog, to select the user's group membership you want to copy.

In NetTools, in the Quick Search, enter the user name you want to copy, and press enter.

Quick Search

Right-click on the user you want to copy and select the AD Properties option from the context menu.

Select AD Properties

In the AD Properties dialog select the Member of tab, this shows the groups that the user is a member of.

Member Of tab

Select all the groups, or the groups you want to copy and move the mouse over the DN column and right-click and select Copy->Column to copy the list of DNs for the selected groups.

Select and Copy groups

Using Quick Search, search for the user you want to add the selected groups too.  Open the AD Properties for the user and select the Member Of tab.

Click on the Add button to display the Object Search dialog.

Object Search

In the Object Search dialog, right-click in the top select and select Paste from the context menu.

Object Search - Paste

The selected groups will be displayed in the top sections.  Now select all the groups and click on Add and then click OK.

Object Search - Selected

The groups have been added to the user, and the membership is now updated.

Member Of - Groups Added

How To Edit an AD object’s Permissions

Features shown in this post are only available in NetTools v1.31.6 and above.

NetTools allows editing the permissions of the objects in Active Directory.  An object's permissions can be edited from the Permissions dialog, which provides similar functionality to the ADUC permissions dialog, but provides more control over the permission configuration than the native tools.  The Permissions dialog is accessed via the Permissions options on the context menu, which is available throughout NetTools.

Permissions dialog

By default, the Permissions dialog opens in read-only mode.  To enable editing of the permissions, right-click on the list of permissions and select Edit from the context menu.  Once selected, the edit control bar is displayed at the bottom of the permissions list.

Edit Permissions
Edit Permissions

The buttons on the edit control bar allow you to add, edit, and remove permissions.  The Restore Defaults button, will restore the default permissions for the object, as defined in the schema for the object.  The Inherit permissions from parent option allow block inheritance from the parent object, when unselected, you are presented with the option to copy the existing inherited permissions.

It is possible to update both the DACL or SACL permissions of an object, but you can only edit one at a time, you must save or cancel any edits before editing the other permissions on the other tab.

If the Permissions dialog is opened not based on an AD object and the status bar doesn't display the DN of the object, then the Save and Restore Defaults buttons are not displayed, this allows you to modal the permissions but not save them.

The following dialog is shown when adding new permission or editing existing permission:

Add or Edit Permissions

The top part of the dialog is used to select the trustee, the access type, and how the permissions are inherited, and the lower section specifies the permissions that will be set.

The edit permissions can be used in conjunction with the Effective Rights tab to model the permissions.

Who can reset your Domain Admin’s password?

If you manage an AD environment, understanding who can reset the password of an account that is a member of domain admins is critical to the security of your environment.  A Domain Admins accounts hold the keys to your AD, if one of these accounts gets compromised and used by a bad actor, it's going to be a bad day at the office.

In this post we will look at how we can use NetTools to report on who can reset the password of your Domain Admin accounts.  This information can be used to identify potential security issues that might need to be addressed to increase the security posture of your environment.

The AD Permissions Reporter can be used to report on what permissions are assigned to specific objects and understand who has the rights to make changes.  The AD Permissions Reporter is located under the Access Control in the Options selection pane on the left side.  By selecting the AD Permissions Reporter the default screen is displayed as shown below.

AD Permissions Reporter

We will build a new Advanced Filter to report on permissions providing these rights, if you want to skip the building of the Filter, you can skip to the bottom of the post where you can find the Filters that you can simply import.

Who can reset the Domain Admins Passwords

To be able to reset the password on an account, you need the Reset Password right, this can be assigned as specific right or when all rights are assigned, this means we will need to build an Advanced Filter which has multiple rules.

The Domain Admins group and any members, including nested members, are protected from the SDProp process and this process will assign permissions to these users and groups based on the permissions assigned to the AdminSDHolder container.  We will use this behavior to help simplify the report that we need to do, as we don't need to query the individual users, as they will have the same permissions irrespective of their location in the AD.

For more information on the SDProp process see SDProp.

At the option screen click on the Select button to open the Select Filter dialog, as we are going to create a new filter click on the Add button.  This will display the new Permissions Filter dialog.

Permissions Filter - Basic

In the Filter Name field enter 'Who can reset Domain Admins Passwords' and then click on Advanced Filter button which will open the Advanced Filter .

Who can reset domain admins passwords

First we need to define the scope of the Filter, and as we are going to use the AdminSDHolder for this filter, we will set an LDAP Filter to select it.  Untick All Objects in the Object Scope section and select LDAP Filter.  Make sure the Search Scope is set Sub Tree.  In the Filter field enter the following Filter:

(name=adminsdholder)

Make sure that the Match all option in the Matching Logic is set.

Next we need to set the Permission we want to search for, Expand the Permissions section.  Set the Matching Rule to All and check the Extended Right option and from the dropdown list select "reset password" option.  Your Filter should look like this:

Who can reset domain admins passwords - Rule 1

This rule covers the specific granting of the reset password right, however users that have been assigned the All Validate Rights can also reset the password, so we need to add another rule to search for this permission as well.

On the left side click on the Add button under the Filter Rules, this will add a new Rule2 entry.  With version V1.31.3 and below there is a bug which resets the Object Scope when a new Rule is created, you just need reselect the LDAP Filter option.

As we want to return permissions if either of these Rules are matched, select the Or option in the Multi-rule Logic

Select the Match all option in the Matching Logic Section

Expand the Permissions section, select the Extended Rights option.  As we want to return the All Extended Rights, we need to select -None- from the dropdown list.

Who can reset domain admins passwords - Rule 2

Click on the OK to save the Filter.  In the Select Filter window click on Select.

With the Filter selected click on Go.  Once the scan has completed you should get something like this:

Who can reset domain admins passwords - Results

The results show you which permissions provide the rights to reset the password.  Now to find out which users have these permissions, we need to select the Report View tab, which displays all the permissions in a list view, now by right clicking on one of the permissions and selecting List Users from the context menu, you will get the complete list of users that have these rights in your environment.

context Menu - List Users

This will switch to the Group Members option and will display all the users and members of the groups.  This is the list of users that have the rights to reset the password on the Domain Admin accounts.

List of Users

Filters

If you you don't want to build the filter yourself, here is the save filter, you just need to copy the text below and import as a filter, see How to Import Filter

Who can reset Domain Admins Passwords

[Who can reset Domain Admins Passwords]
LDAPFilter=(name=adminsdholder)
Count=2
Options=18944
Rule1_Enabled=1
Rule1_Options=1281
Rule1_SDControl=0
Rule1_SDNotControl=0
Rule1_SDNullAcl=0
Rule1_Prompt=0
Rule1_Token=0
Rule1_AuthGroups=0
Rule1_Scope=8
Rule1_NotScope=0
Rule1_ACEType=0
Rule1_ACEFlags=0
Rule1_ACENotFlags=0
Rule1_Perms=256
Rule1_NotPerms=0
Rule1_Property=00299570-246D-11D0-A768-00AA006E0529
Rule1_NoProperty=0
Rule1_PropType=4
Rule1_MatchRules=546
Rule2_Enabled=1
Rule2_Options=1281
Rule2_SDControl=0
Rule2_SDNotControl=0
Rule2_SDNullAcl=0
Rule2_Prompt=0
Rule2_Token=0
Rule2_AuthGroups=0
Rule2_Scope=8
Rule2_NotScope=0
Rule2_ACEType=0
Rule2_ACEFlags=0
Rule2_ACENotFlags=0
Rule2_Perms=256
Rule2_NotPerms=0
Rule2_Property=00299570-246D-11D0-A768-00AA006E0529
Rule2_NoProperty=1
Rule2_PropType=4
Rule2_MatchRules=530

GPO Explorer – GPO Test Details

Some of the Features and Tests listed here are only available in NetTools v1.31.4 and above.

The GPO Explorer Test feature provides similar functionality to the retired Microsoft GPOTool.exe utility.  This post provides the details of the completed tests and how the results are compared to the other selected DCs.

The test feature appears in two locations in GPO Explorer, one as a tab on the individual policy details and the other at the domain level to test multiple GPOs simultaneously.  While how the results are displayed is different between the two test types, the same testing is completed for both instances.

The Domain option looks like this and provides a very similar output to the retired GPOTool.exe.

GPO Testing Results

The individual test looks like this:

GPO Testing Results - Individual

DC Selection

By default, the tests are performed against all the DCs in the domain. However, it's possible to define which DCs you want to include in the test.  The Domain level test, as shown above, provides a list of DCs that have been discovered; you can limit which DCs will be included in the test by selecting as required DCs.  This selection is then used for both the Domain and Individual tests.

Test Details

The testing is completed in two phases; first, the details are collected from each of the selected DCs, and then in phase two, the captured details are compared across all the selected DCs.  The first selected DC in the server list is used as the source, and all the other DCs are compared against this DC; you can change this by using the context menu to move another DC to the top of the list, which will be used as the source DC.

During the Collection phase, the following details are captured and tests performed:

  • Display Name of the Policy
  • Sysvol Path
  • Functionality Version
  • GPO Flags
  • GPO Version Number (User and Machine)
  • WMI Filter assigned
  • GPO Machine Extensions
  • GPO User Extensions
  • When Created
  • When Last Changed
  • AD Permissions
  • Number of sub-AD objects under the GPO for both User and Machines settings
  • Check the Sysvol path is accessible
  • Capture the security permissions of the root of the policy folder
  • Check that the trustees assigned Apply Group Policy right in the AD have access to the following location in the Sysvol path:
    • The root of the policy folder
    • GPT.ini
    • User folder
    • Machines folder
  • Capture the GPO version details from the GPT.ini file (User and Machine)
  • Capture the file count, total file size, and directory count for these sub-directories:
    • Machine
    • User

Once the details have been captured from all the selected DCs, phase two will compare each value to confirm the details are the same across all the DCs.  If there are any differences, it will report an error, or the traffic lights indicators for the test will be Red.   The Compare phase, in addition to comparing the details captured in phase one, will also complete the following tests:

  • Compare the AD DACL ACE Count
  • Compare the Sysvol DACL ACE Count
  • Confirm the ACE in the Sysvol DACL are in the same order
  • Compare the AD Security Descriptor
  • Compare the Sysvol Security Descriptor
  • Check for duplicate ACEs
  • Check the order of the permissions

The Individual test option displays the results as pass\fail and doesn't provide much detail on the reason for the failure.  However, the Domain level test provides details of the captured information and failure details when the Display Policy Details option is selected before running the test.

If any AD replication tests fail, you can select the individual GPO and use the Context Menu option to run a Check AD Replication test on the GPO AD object; this will automatically populate the Attribute Replication test for you.

Check AD Permissions

Debug Option

The GPO test also provides additional debug information in the Domain level test, which is helpful if you are trying to diagnose ACL issues as reported by the GPMC Status report.  This debug option is not enabled by default and can only be enabled by manually editing the NetTools.ini file.

  1. Open the NetTools.ini file
  2. Search for [SavedOptions]
  3. Add GPODebug=true after the heading
[SavedOptions] 
GPODebug=true

How To Read the contents of Registry.pol files

The registry.pol files are used to store Group Policies settings, these files typically exist in the Group Policy Template (GPT) which is hosted in the sysvol share on the domain controllers, but can also exit on local systems.

GPO settings in the Registry.pol files are saved in a binary format, and the normal AD GPO management tools don't provide a method to show the contains of these files.  NetTools v.1.31.3 and above includes an option to be display the contents of these files.

This option exists under the GPO Explorer option, once the Refresh button has been clicked the GPO details are displayed. The Registry.pol Reader option is the last option in the left hand pane.

Registry.pol Reader

To open a registry.pol file, right click on the Registry.pol Reader entry and select Open Policy File option from the context menu.

GPO Explorer Context Menu

Select the file using the file browser, once the file is selected the contents of the file are displayed in the right hand pane.  This view uses the same navigation as with the Settings tab for a policy.

Registry.pol Reader - Settings

Note: NetTools is a 32 bit application, and when accessing the system32 folder on the local system drive, wow64 will be used when browsing system directories and as a result, some files that you expecting to find, might not be shown in the file browser dialog.  If this happens, using file explorer, copy the file from the system directory to non-system directory i.e. c:\temp and try again.

How To Delegate Windows DNS Policies

DNS Policies were introduced in Windows 2016 and provide the ability to define policies or rules that controls the results that are returned by the DNS server.  This functionality can be used to implement:

  • High availability of DNS services
  • Traffic management
  • Split-brain DNS
  • Redirection based on date/time

Unlike other DNS services DNS Policies can only be managed by Domain Admins, in this article we look at what changes need to be made to allow DNSAdmins to be able to manage DNS Policies.

Normally the DNSAdmin group provides rights to manage DNS services, however, it appears these permissions haven't been extended fully to the DNS Policies.  The configuration details for the DNS Policies are saved in the AD and the local registry of the DNS server.  While DNSAdmins have rights to the AD, the group has not been grant rights to registry to be able to create DNS Polcies.

To be able to delegate permissions to the DNSAdmins group, you will need to update the registry with additional permissions for DNSAdmins.

Open Regedit and navigate to 'Computer\HKEY_LOCAL_MACHINE\SOFTWARE\Microsoft\Windows NT\CurrentVersion\DNS Server' On the Permissions for the DNS Server key, and add DNSAdmin full control.

This screenshot shows that the DNSAdmins group has been granted the extra rights.

DNS Policies - Registry Permissions

How To Delegate Object Restoration Rights

In this post we will look at how to delegation the restoration of deleted objects using the AD Recycle Bin.

First we need to enable AD Recycle Bin, this is enabled by default on newly built forests with DC of Windows 2012 and above, for older forests all the domain controllers must be Windows 2008 R2 and above and you will need to run this command from a PowerShell command prompt to enable AD Recycle Bin:

Enable-ADOptionalFeature 'Recycle Bin Feature' -Scope ForestOrConfigurationSet -Target <your domain>

By default only domain administrators have the rights to restore object that have been deleted, the following steps will delegate the ability to restore deleted objects to the members of the "Restore_Objects" group.

1.  Create an new AD group called 'Restore_Objects', the group can be a local, global or universal depending on your requirements

2.  Next we need to set restoration rights on the root of the domain, open a command prompt with Run As Administrator rights and run the following command:

dsacls dc=<your domain>,dc=<com> /g "restore_objects:ca;Reanimate Tombstones"
Root Permissions

3.  To be able to change the security on the Deleted Object container, we first need to take ownership of the container, from the same command prompt run the following command:

dsacls "CN=Deleted Objects,dc=<your domain>,dc=<com>" /takeownership

4.  Now we are owners of the Deleted Objects container we can update the permissions, first we will assign the delegation group the rights to list the contents of the Deleted Objects container and read the properties of the objects using the following command:

dsacls "cn=deleted objects,dc=<your domain>,dc=<com>" /g "restore_objects:LCRP"
Deleted Object Permissions

The permissions set so far provide the Restore_Objects group with the rights to restore objects and view the contents of the Deleted Objects container.  However, they can't restore objects yet, they also need write permissions to the properties of the objects that have been deleted in order to be able to restore them.

Depending on your requirements, you can assign the properties permissions at the root of the domain so the Restore_Objects members can restore any deleted object in the domain or you can limit the delegation to a particular OU or object type.

This is the command to assign the required permissions

dsacls "ou=<your ou>,dc=<your domain>,dc=<com>" /I:T /g "restore_objects:WPCC"

This shows the permissions assigned at the OU level:

OU Permissions

In this case the members of the Restore_Object group, will be able to see all the of the Deleted Object but will only be able to restore the objects that were deleted from Restore OU, unless they have been assigned Write All Properties (WP) and Create Child (CC) rights through other permissions.

To restore objects you can use the Restore Objects option in LDAP Browser, see How To Restore AD Deleted Objects for more details.

How To View the Permissions that will be assigned by the SDProp Process

This is a quick post to show how to display the permissions that will be assigned by the SDProp Process.

The SDProp process uses the AdminSDHolder container object as a template for the permissions that will be assigned to any users or groups that are protected by the SDProp Process. For more details on the SDProp Process see the SDProp Option.  The permissions assigned to the ADminSDHolder are used to replace the existing permissions when an object first comes into scope, or if the permissions of an existing in scope object are changed.

Using the NetTools Permission Browser option (formally - ACL Browser) is it very simple to view the permissions.  In the left hand pane navigate to the Access Control - Permissions Browser option.

Click on the Refresh button, this will display the directory tree, navigate down the tree to CN=System, CN=AdminSDHolder.  With the AdminSDHolder object selected the permissions will be displayed in the middle pane:

AdminSDHolder Permissions

We can use the Permission Compare feature to confirm that the permissions have been applied to a protected object.  In the tree view of the Permissions Browser right click on the AdminSDHolder node and select Select Left SD to Compare

Select Left SD to Compare

Using the Quick Search option we can search for a protected group i.e. Domain Admins.

Quick Search - Domain Admins

From the search results right click on the domain admins group and select Compare to 'AdminSDHolder' SD

Select Right Compare AdminSDHolder

This will display the Compare Permissions dialog, allowing you to confirm that the AdminSDHolder permissions have been applied to the Domain Admins group, you can repeat these steps to confirm any of the users or groups that are protected by the SDProp process.

Compare Permissions - AdminSDHolder